An Intro To Flutter
When Google I/O came and went in May one of the topics that captured a lot of interest was Flutter. Offering a whole new option for cross platform code, Flutter has been gaining traction over the past few years. I talked about it briefly a few weeks ago, but let’s dive more into the details of why it may be worth learning.
What is Flutter?
First, let’s get a quick primer of what Flutter actually is. It’s a toolkit developed in 2017 by Google that allows you to write code for both Android and iOS devices. You can write code once, and then implement it anywhere. And by anywhere, I mean Android, iOS, web, and desktop. Already if you’re a freelancer I’m sure you see some appeal here!
It’s written in Dart which hasn’t been too popular of a language in the past, but Flutter is breaking that trend. It’s been featured at I/O for a few years straight now, and Google uses it for internal apps, so it’s not going away any time soon. The framework revolves around widgets. Everything in a Flutter app is a widget. Widgets describe what a view should look like given its current state, and when that state changes a widget rebuilds its description. It sounds kind of foreign until you dive in.
Let’s see some code!
I won’t waste time going through how to set up Flutter on your computer. Here’s a good link to walk you through that (don’t worry it’s super simple). For my personal use I’ve been using Flutter in Visual Studio Code, but you can also develop in other IDE’s such as Android Studio if you’re more comfortable with those. To get started run the command flutter create hello_world. This will take care of everything for you creating a new application named hello_world. To run it, type cd hello_worldto enter that directory, and then type flutter runto kick things off.
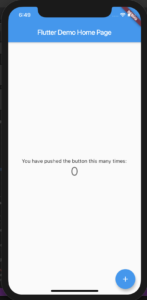
Congratulations! You’re officially looking at your first flutter app. Whether you ran it on an iPhone or an Android device (or somewhere else) you should see an app that looks like this:
So what made this app? Well, this is from the default code that Flutter made for us. In your navigation sidebar you should see folders for things such as android, ios, and lib. There are some others as well, but I point these out because at its core you’ll work in the lib folder. And the others will allow you to transport that code into iOS and Android phones. That’s REALLY oversimplifying it, but it’s not wrong!
main.dart:
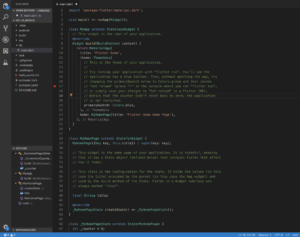
Let’s open the lib folder, and inside we’ll see one file named main.dart. This is the core of your app right now. If you open up main.dart you’ll see what is creating the widgets currently showing on your phone. For anyone just reading and not following along, here’s what it looks like:
In here we can see pretty hefty comments explaining everything. The app starts by calling the method runApp() and passing in an instance of our class MyApp. And as we can see right below that, MyApp is a StatelessWidget. There are stateful and stateless widgets in Flutter, and we’ll go into them down the road, but for now just know what a widget is.
One really cool thing about Flutter is hot reloading. When you want to rerun an app and see any changes you’ve made, you only have to recompile widgets that have changed their state. The end result of this is incredibly fast reload speeds (milliseconds). Go ahead and try this out. Under theprimarySwatchattribute change it from Colors.blue to Colors.red. Once you’ve done that save the project and in the terminal press “r”. Instantly you’ll see the theme of your app change from blue to red. It’s really that simple to reload!
I’ve loved my experience thus far with Flutter because of the way it is structured and hot-reloading. There’s a whole world of development to explore, but if you get started and want to let us know what you like/dislike about it let us know in the comments below!


Super Fans always leave a comment :-)