
Reduce, Reuse, RecyclerView
Mobile users have developed a rigorous set of standards in the past few years. If an app takes more than a few seconds to launch, they’re annoyed. If a button takes more than one second to react to a click, there will be some uninstalls. With such high expectations for performance app developers need to make sure they do everything in their power to speed up their apps.
RecyclerView For Efficiency:
The Android OS has grown alongside user expectations. New libraries and views have emerged to offer improvements to an app’s efficiency. One of these that EVERY Android developer should know is the RecyclerView. RecyclerView is (as defined byAndroid) a flexible view for providing a limited window into a large data set.
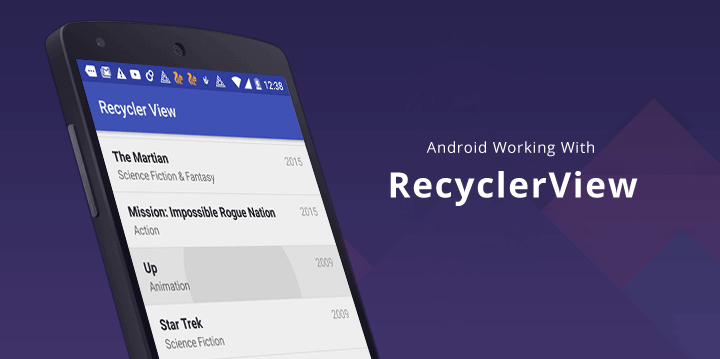
Basically, think about every list you scroll through on an app. Odds are that list is a RecyclerView. The idea is you can map out how large you want the space to be on a user’s screen, and then that portion of the screen will be scrollable showing a number of smaller layouts. Each of these can be designed however you see fit.
Think of Spotify’s list of songs in your library for example. Each layout in the list holds TextViews displaying the song name, artist, an ImageView of the album cover, and an arrow on the right indicating you can click on it for more information. This layout is used again and again but different information is loaded into it each time.

But How Is It Efficient?
So if you saved 2000 songs to your library then every time you open the app you’ll have to load 2000 layouts? That sounds like an awful user experience as they have to wait. No you won’t, and that’s the beauty of a Recyclerview. Your app is only going to create 10-15 of those layouts. Then as you scroll it will empty the top layout’s info, kick it back down to the bottom of the RecyclerView, and load it with new data.
Your app has all the info from the list, but it only has to create views for items as they appear to the user. And once a few views have been created, it won’t ever have to make new views since it recycles them as you scroll. I wonder how they came up with the name RecyclerView…
Setting Up RecyclerView
Adding a RecyclerView to your app’s layout is not too complicated, but there is a fair amount of work involved. Phonlab’s Android App Developer Course shows a detailed step by step tutorial, but we’ll cover the 30,000ft view here. The process essentially breaks down into two parts: Your layout and your adapter. The layout is more straightforward; it’s you creating an xml wireframe view for where you want the info to load. What should a layout look like when it’s given the proper info?
The adapter is a little more complicated. There are three methods that your RecyclerView adapter will override. These are onCreateViewHolder(), onBindViewHolder(), and getItemCount(). In order these tell your adapter what to do when creating a new layout, adding new data to a layout, and how many items are in the list total. onCreateViewHolder will be called every time we need to make a new layout, but once the initial work is done and a user begins to scroll onBindViewHolder will be where you add click listeners and other interaction logic.
Seeing it in action:
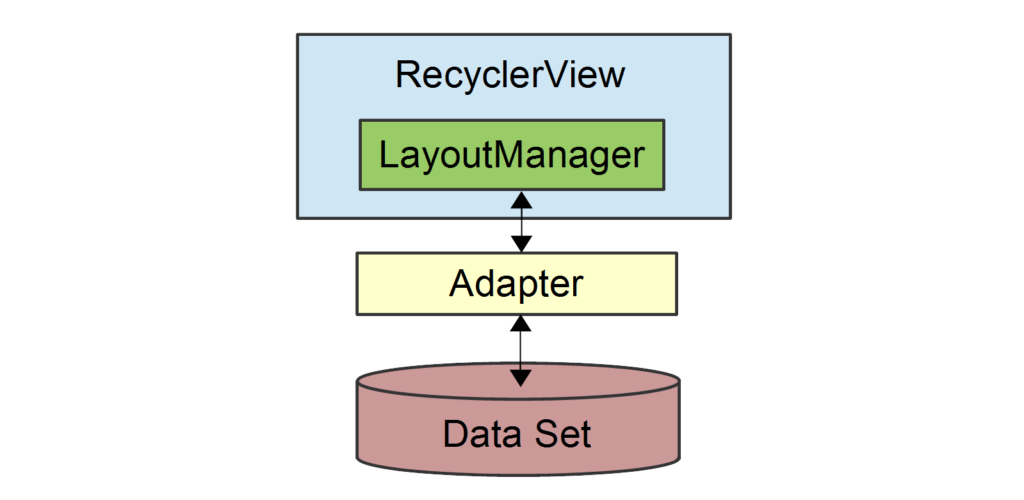
After you have all of your logic for loading the data into a ViewHolder (layout) you need to create an instance of the RecyclerView in your app. Then set the RecyclerView’s LayoutManager and Adapter using the class’s methods. If everything is set up correctly and you’ve added an xml RecyclerView in your parent layout, then clicking run should show your scrollable list of views.
It’s essential your app meets current standards for efficiency. RecyclerView is a great way to improve responsiveness. With it you can present users with immense amounts of data without slowing down their experience at all!
Super Fans always leave a comment :-)